
What is the difference between Funnel Events and Lead Events in Facebook Conversion API?
In LeadConnector, we support two types of Facebook Conversion API.
Funnel Events – The events are sent from a web server to record the events when the user visits the page, adds products to a cart, purchase, subscribe, submit an application, and more. To learn more about how to set up Funnel Event Pixel using FB CAPI, please read this article.
Lead Events – The LeadConnector CRM sends the events with how the Lead moves across the pipeline stages. For example, a Business creates a pipeline name Lead Generation. The leads are moving across the pipeline stages, from new leads to booked or abandoned ones. With Lead events, LeadConnector CRM sends the data to Facebook Conversion API – with CRM being the data source.
Conversion Leads –
Facebook conversion leads integration helps your Facebook lead ads Instant Forms optimize for the quality of leads instead of the volume of leads. When users submit the Instant form, their contact information is captured and synced in Highlevel’s CRM. This contact information can then be used to follow up with the leads to nurture them and move them further down the sales funnel. As each Lead moves through the sales funnel, the Conversion leads integration allows the advertiser to share the lead status with Meta, which allows Meta to optimize the lead ad for increased lead-to-sales Conversion. will enable
Guidelines to ensure your business is a good fit for the Conversion Leads integration:
- Use Facebook/Instagram Lead Ads (Instant Forms) [Facebook form field mapping inside LeadConnector is used]
- Ensure the 15-16 digit Meta Lead ID is mapped to your CRM
- Generate at least 250 leads per month
- Can upload data regularly at least once per day
- The lead stage you want to optimize for occurs within 28 days of leads being generated
- The lead stage you want to optimize for has a 1% – 40% conversion rate.
How to set up FB CAPI (Conversions API) Lead Event?
Step 1: Create an FB Pixel:
- Please start creating a pixel by going to your Facebook Business Manager (also called the Meta Business Suite) > Head over to the left and then the Events Manager tab.
- Ensure you are connected to the correct Ad Account with all the required Access to that FB Page.

- Head over to the left sidebar and then click on Connect Data Sources

- Choose CRM in the options that show up, and then hit Connect.


- It will show you a popup with Best Practices and a button to click Next. The Best Practices are Facebook suggestions on how to utilize this capability best. Click on Next to proceed.

- Click on Create New Pixel or Use an existing pixel from the list for collecting the data. Click Continue when the pixel details are added.

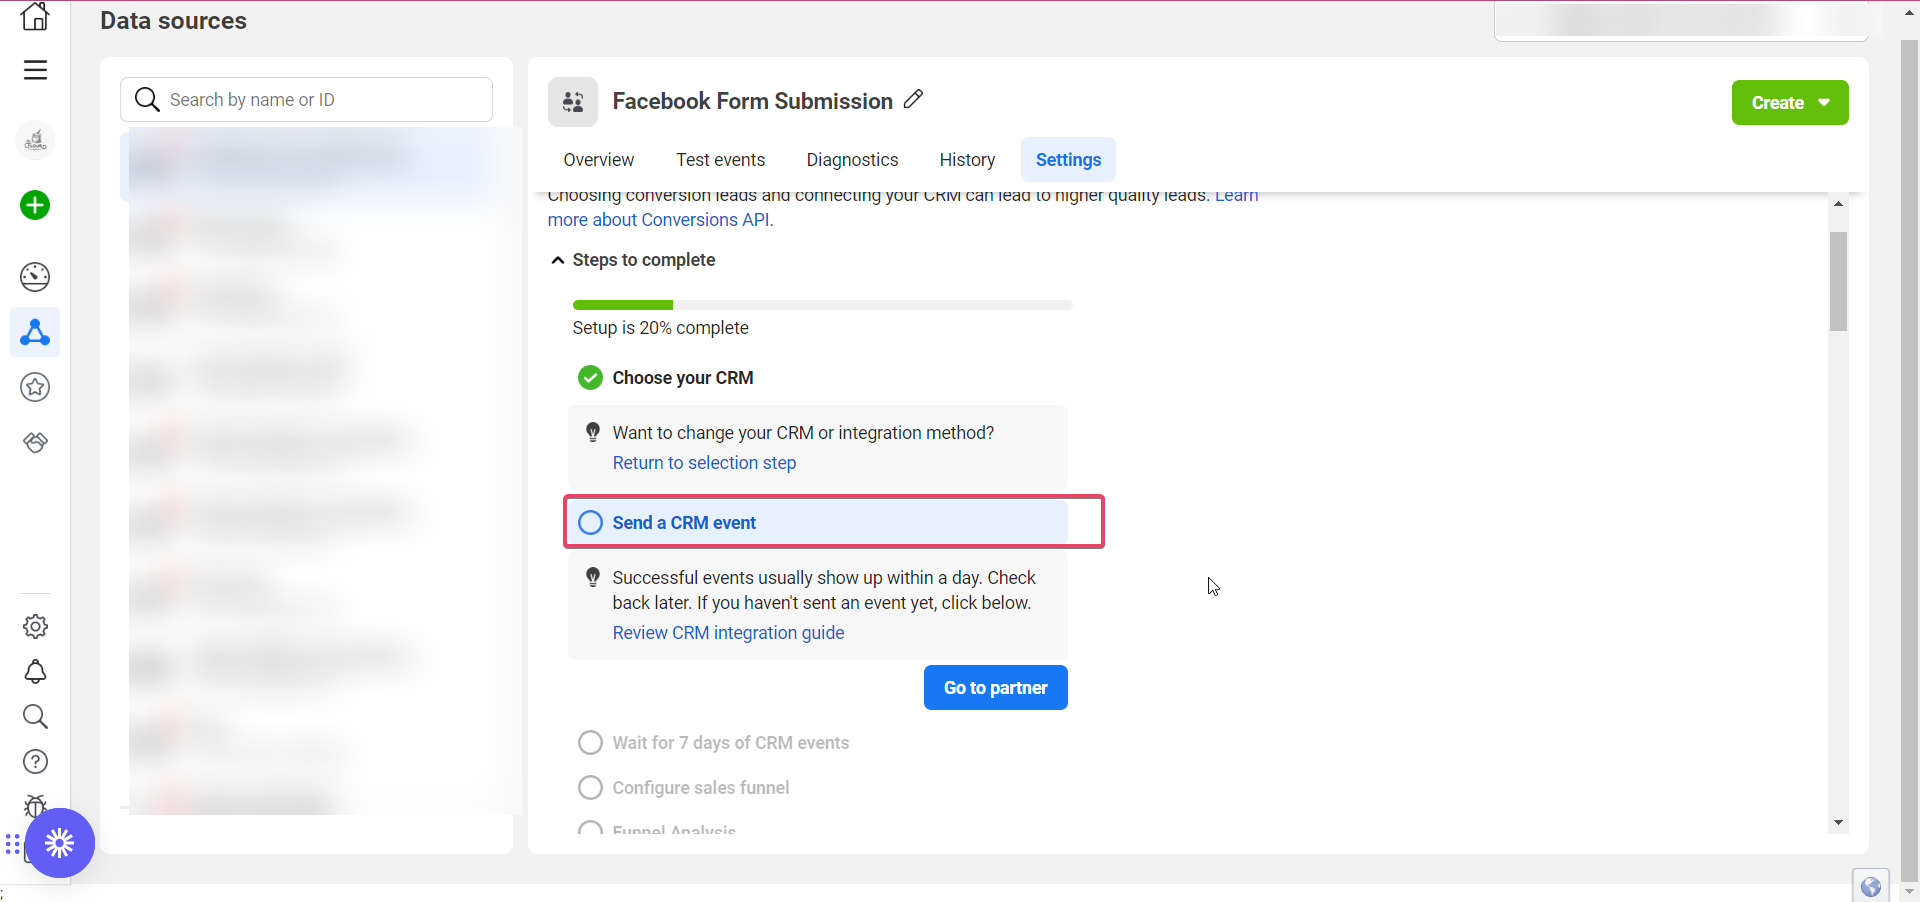
- It will take you to your FB Events Manager> Data Sources> Settings.

Hit Continue in front of Choose Your CRM
- Search for LeadConnector in the search bar, and choose LeadConnector from the dropdown:

- Select Use a third-party partner to connect in a few steps (no coding required), then choose LeadConnector. Then click on Go to Partner to proceed.It will ask you to grant LeadConnector permission to connect with your Facebook Conversions API, and then your CRM should be connected.

Please Note
Prerequisite for Facebook CAPI – Lead Events
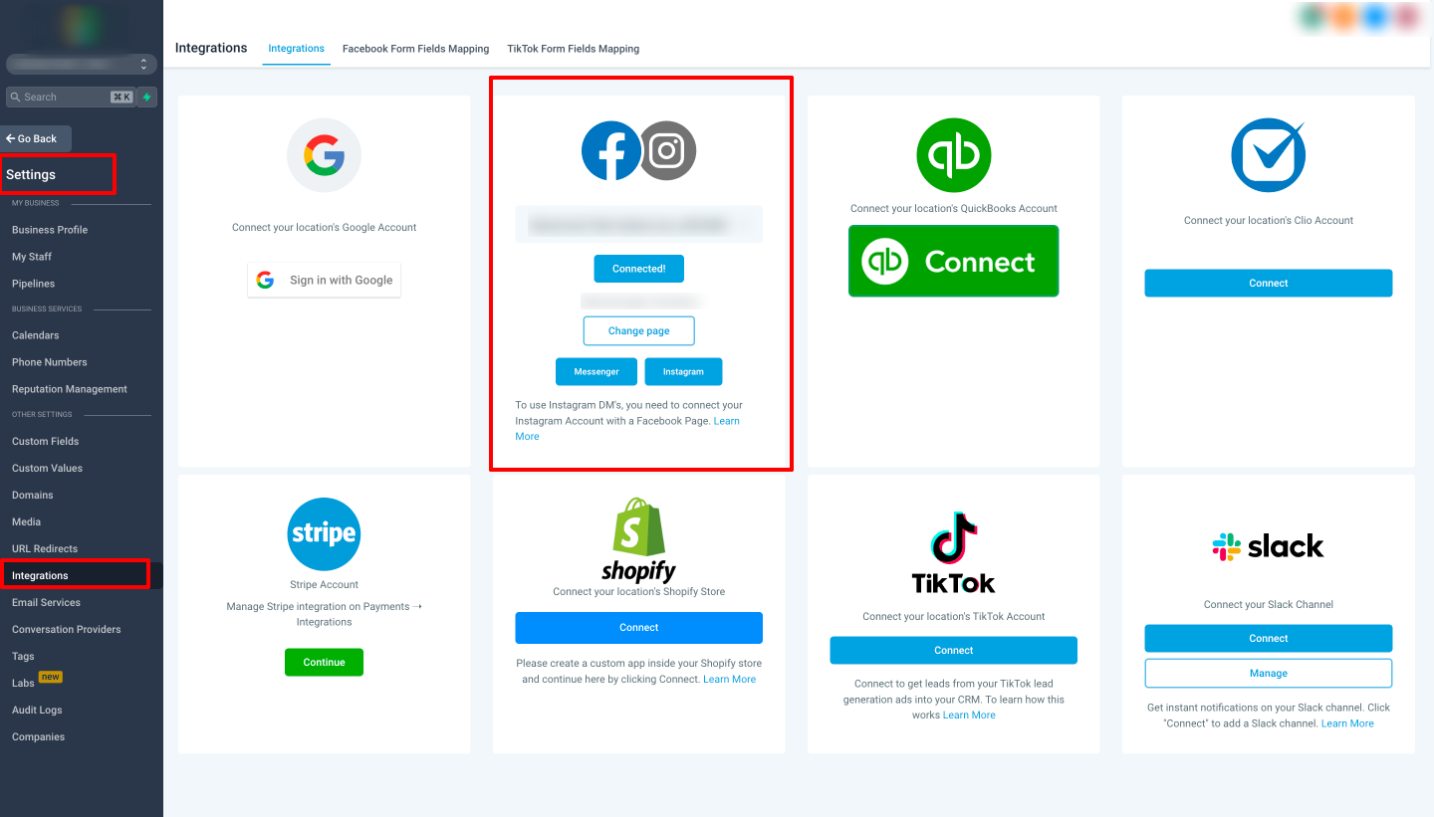
1. In CRM, please go to Settings > Integration > Check the Facebook account is connected with admin permissions. Please ensure that your FB Business Page, which you are an admin of and have all access to, is integrated and the correct FB lead Form is mapped in your CRM account.


To send a CRM event from your CRM, you need to create a workflow that does that. For now, you can navigate away from the FB Events Manager> Data Sources> Settings (but keep it open in a tab in your browser)and head over to your CRM account.
Workflow -1 to Create/Update Opportunity
Once the FB page is integrated correctly in sub-account settings, go to your Automations> Workflows >Create a new Workflow.


Add a new Workflow Trigger in your Workflow and have it get fired off by Facebook Lead Form Submitted (if that is the first stage of your conversions flow)


You can add filters to choose which specific Facebook Lead Ad form to get the Workflow to be triggered by submissions to that form only:


And then add the action for Create or Update Opportunity.
Specify the Pipeline and Pipeline Stage for this action.


The Opportunity Name can be defaulted to the Lead’s Full Name by using the custom value dropper:
Toggle on Allow Duplicate Opportunities for this particular Workflow.


- Make sure to save your actions and then save and Publish the Workflow.


Workflow -2 to send Conversion data to FB Conversion API
Create another workflow. Add the Pipeline Stage Change trigger and a Facebook Conversion API action.
 Choose Lead Event as the Event Type

Make sure to save your actions and then save and Publish the Workflow.
- Navigate to your Facebook Events Manager> Data Sources> Settings> Scroll down and click on Generate Access Token.

Copy the generated Access Token.
- Paste it in the Access Token field of your Workflow’s FB Conversion API Action.

- Navigate to your Facebook Events Manager> Data Sources> Settings> Scroll down and copy your Pixel ID.

- Paste the Pixel ID in the Pixel ID field in your Workflow’s FB Conversion API Action.

- Fill in the Stage Name; it should accurately represent your Pipeline and Pipeline Stage name for better reporting. Select it using the tag icon at the end to add the custom value of the opportunity pipeline and stages. Save the Action, save and Publish the Workflow


Save the Action, Save and Publish the Workflow.

The Event should be picked up by your Events Manager, who is actively waiting for Events sent by your Workflow. It takes up to a day to successfully pick up an event sent by your Workflow.
Once the Event is sent from the Lead Ads Test Tool, please go to Opportunity Pipeline and move the dummy Facebook lead to another stage configured in the Workflow. Once this is completed, check the workflow status as executed and the conversion API event in Event Manager.

11. Return to the “settings” tab in Events Manager to track the progress of the Conversion Leads integration.